Mike's LCR Statement Build

Collapse
This topic is closed.
X
X
 
  • Time
  • Show
Clear All
new posts
  • mikela
    Member
    • Mar 2008
    • 98

    Mike's LCR Statement Build

    Hi folks,

    Well I have decided to take the plunge and build three identical sealed Statements. I plan on placing these behind a 10' wide SMX 2.37 acoustically transparent screen. I have a full Magnepan 1.6QR 5.1 system but feel that I will end up with placement issues with the screen. Mangepan's higher end systems have ribbons and I have allways wanted to try them out. So we shall see. I also have a Velodyne DD18 so the sealed Statements should blend nicely at around 40Hz. I am considering building the crossovers external to the boxes so I have direct access to the drivers. I have a DEQX which is currently being upgraded to the new HDP-3 and will be interested in seeing how that works for critical listening in stereo and possibly tri-amped by Hypex amps.

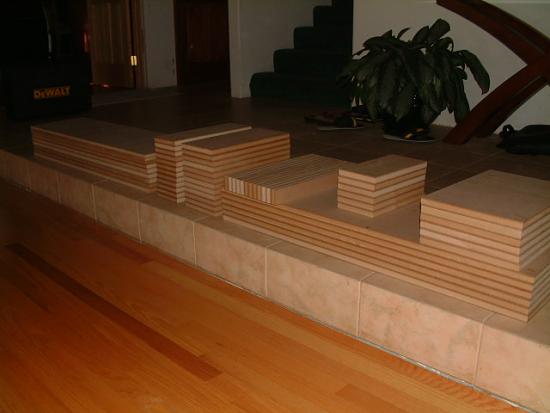
    Anyway here are some pics of the cut MDF. I am slow so progress won't be anywhere near the pace I have seen from others.

    Mike

    Click image for larger version

Name:	DSCF1015.JPG
Views:	1842
Size:	69.8 KB
ID:	869218
    Last edited by theSven; 17 August 2023, 01:18 Thursday. Reason: Update image location
  • Jim Holtz
    Ultra Senior Member
    • Mar 2005
    • 3223

    #2
    Hi Mike,

    That's a serious pile of MDF! We're looking forward to seeing your progress and the final results.

    Jim

    Comment

    • CupCak3
      Senior Member
      • Oct 2007
      • 127

      #3
      That's looks like the uber ridiculous pile I started with (LR + CC statement, R44 surrounds and two subs) This reminds me I still need to get my progress pics up I haven't been too worried about making alot of progress as PE still has a couple of my resistors still on backorder

      Good luck!

      Comment

      • mikela
        Member
        • Mar 2008
        • 98

        #4
        Yeah, I still plan on building a couple of the Monitors for surrounds once Curt completes the crossover(s).

        Do most people glue the 1/2" and 3/4" baffles together prior to routing or do they route the 3/4" then glue and use a flush trim bit on the 1/2"? Also, I saw a picture somewhere indicating some routing of the outside of the TL enclosures for the ribbons to clear. I take it that should be done prior to gluing the TL to the baffle?

        Mike

        Comment

        • impala454
          Ultra Senior Member
          • Oct 2007
          • 3814

          #5
          Originally posted by mikela
          route the 3/4" then glue and use a flush trim bit on the 1/2"?
          That's not a bad idea, never thought of that.
          -Chuck

          Comment

          • David_D
            Senior Member
            • Feb 2008
            • 197

            #6
            Hi Mike,
            I never thought about doing it with a flush bit either. It certainly has merit. Myself, I glued the panels together first then machined them as one piece.
            Yes, you need to releive the rear of the baffle before the Mid Transline goes on. Good Luck... more pics.
            -David

            As we try and consider
            We receive all we venture to give

            Comment

            • tabasc07
              Junior Member
              • Oct 2007
              • 28

              #7
              That sure is a lot of mdf. I look forward to seeing all this. I was thinking of doing a similar setup, but use a mini instead of another statement for the center channel. Anyways, I hope you have fun with your build and enjoy the results. I'll be following this thread as well as the monitors thread.

              Comment

              • Dave Pellegrene
                Junior Member
                • Apr 2008
                • 22

                #8
                Originally posted by mikela
                Yeah, I still plan on building a couple of the Monitors for surrounds once Curt completes the crossover(s).

                Do most people glue the 1/2" and 3/4" baffles together prior to routing or do they route the 3/4" then glue and use a flush trim bit on the 1/2"? Also, I saw a picture somewhere indicating some routing of the outside of the TL enclosures for the ribbons to clear. I take it that should be done prior to gluing the TL to the baffle?

                Mike
                Hi Mike,
                I made up one 1/2" baffle and used it to make up the other 1/2" baffle with the flush bit. Then glued them to the 3/4" baffle then routed them. It also helps when gluing the baffles together to put a couple of pin nails in them, one at each end before you clamp them and that will help to keep them from sliding around as you clamp. Be careful not to put the pins were you might hit them.
                Dave

                Comment

                • mikela
                  Member
                  • Mar 2008
                  • 98

                  #9
                  Indoor and outdoor gluing operations are underway.

                  Click image for larger version

Name:	DSCF1016.JPG
Views:	1209
Size:	73.6 KB
ID:	850410

                  Click image for larger version

Name:	DSCF1017.JPG
Views:	1031
Size:	69.3 KB
ID:	850411
                  Last edited by theSven; 17 August 2023, 01:18 Thursday. Reason: Update image location

                  Comment

                  • mikela
                    Member
                    • Mar 2008
                    • 98

                    #10
                    Clamp time?

                    How long do most folks leave their clamps on with Titebond III? Is several hours OK?

                    Mike

                    Comment

                    • Hdale85
                      Moderator Emeritus
                      • Jan 2006
                      • 16075

                      #11
                      Yeah thats more then enough. I let it sit up for about an hour or so and then moved on.

                      Comment

                      • mikela
                        Member
                        • Mar 2008
                        • 98

                        #12
                        Dougie085,

                        Thanks!

                        Mike

                        Comment

                        • Bent
                          Super Senior Member
                          • Sep 2003
                          • 1570

                          #13
                          Hehehe,t
                          speaker building inside the house...

                          I bet you'll get to the point where you'll think, " gee, I'm sure I cann just route the driver holes right here in front of the fireplace - all the dust should blow into the flu...", then it'll start. You'll have the saw horses set up, a work table at a right angle... etc.

                          BTW, the project looks like it's off to a great start.

                          I'm in the end throes of a subwoofer build where temperature are just above freezing, talk about long glue set-up time.

                          Comment

                          • mikela
                            Member
                            • Mar 2008
                            • 98

                            #14
                            Hi Bent,

                            Hope things warm up for you. No. No sawdust in the house. I used the sun canopy in my driveway with a Ridgid table saw that has a caster wheel lift and saw horses with MDF sheet as runoff table for all cutting operations. Great dust system!

                            Well I got all the 5" wave guides glued and dry fit the system together. Everything is right on the money so far. Also drew out baffle dimensions. I like the way David D did his tweeter cutout and will probably do the same. In some of the photos from others it appears there is very little material remaining for a good seal. Could just be the pictures.

                            Question: Is it really necessary to use silicon inside the box? The Titebond III seems to do a pretty good job of sealing.

                            Mike

                            Click image for larger version

Name:	DSCF1019.JPG
Views:	1104
Size:	73.6 KB
ID:	850428
                            Last edited by theSven; 17 August 2023, 01:19 Thursday. Reason: Update image location

                            Comment

                            • David_D
                              Senior Member
                              • Feb 2008
                              • 197

                              #15
                              ALL RIGHT MIKE!!!!
                              Looking good man!
                              IMHO, If you have decent panel cuts... because it is a vented enclosure, the glue should be just fine. If it was a sealed application, I would spend the extra step.
                              It all depends on how you feel about your seams.
                              BTW Thanks for the props on the tweet cut out.
                              -David

                              As we try and consider
                              We receive all we venture to give

                              Comment

                              • mikela
                                Member
                                • Mar 2008
                                • 98

                                #16
                                All,

                                Thanks for the words of encouragement. I am planning on gluing the boxes together today if all goes well.

                                Question: Is it better to use a 3/4 roundover or use a chamfer bit for the rear of the speaker cut outs?

                                Mike

                                Comment

                                • Jim Holtz
                                  Ultra Senior Member
                                  • Mar 2005
                                  • 3223

                                  #17
                                  Originally posted by mikela
                                  All,

                                  Thanks for the words of encouragement. I am planning on gluing the boxes together today if all goes well.

                                  Question: Is it better to use a 3/4 roundover or use a chamfer bit for the rear of the speaker cut outs?

                                  Mike
                                  Hi Mike,

                                  If you used a 1 1/4" thick front baffle, the 3/4" roundover is perfect. If it's a 1 1/2" thick front baffle, the chamfer bit might work better. The goal is of course to open up the back of the baffle around the driver frame so it doesn't "tunnel" the back wave. The driver needs room to breath.

                                  HTH

                                  Jim

                                  Comment

                                  • mikela
                                    Member
                                    • Mar 2008
                                    • 98

                                    #18
                                    Thanks Jim :T

                                    Cut the notches for Founteks using a depth of about 3/16ths. Hopefully, that will be enough. Also, glued all three boxes together. Being a complete novice, I attempted to glue the 5" wave guides in at the same time as the sides, top and bottom on the first one. Luckily, nothing got too far out of control. I may have to plane down an edge of one of the wave guides to make it coplanar when I install the baffle. Can you use a hand planer on MDF? The other 2 boxes are perfect. I am planning on gluing on the backs today and maybe routing the front baffles.

                                    Mike

                                    Click image for larger version

Name:	DSCF1021.JPG
Views:	1116
Size:	70.2 KB
ID:	850482

                                    Click image for larger version

Name:	DSCF1023.JPG
Views:	1022
Size:	71.2 KB
ID:	850483
                                    Last edited by theSven; 17 August 2023, 01:19 Thursday. Reason: Update image location

                                    Comment

                                    • CupCak3
                                      Senior Member
                                      • Oct 2007
                                      • 127

                                      #19
                                      clamp much? It looks like things are going quite nicely... you'll be passing my build status any day now. :T

                                      It's nice to see I'm not the only who bought the jug of Titebond III

                                      Comment

                                      • mikela
                                        Member
                                        • Mar 2008
                                        • 98

                                        #20
                                        Told you I was slow. :W Here are some more photos of the cabinets under construction prior to Memorial weekend.

                                        Mike

                                        Click image for larger version

Name:	DSCF1027.JPG
Views:	889
Size:	75.4 KB
ID:	850586

                                        Click image for larger version

Name:	DSCF1031.JPG
Views:	919
Size:	73.8 KB
ID:	850587

                                        Click image for larger version

Name:	DSCF1032.JPG
Views:	891
Size:	66.1 KB
ID:	850588
                                        Last edited by theSven; 17 August 2023, 01:19 Thursday. Reason: Update image location

                                        Comment

                                        • mikela
                                          Member
                                          • Mar 2008
                                          • 98

                                          #21
                                          Lately, I have been working on completing one baffle to make sure my drivers properly flush mount with the gasket tape from PE. I also used David D's method of gluing in T-nuts. Works pretty well, but, don't try to pull the nuts in by tightening the button head screws in. I ended up using a 10mm socket head to tap the nuts in place. Also, only put glue on the flange of the nut not on the shaft with the threads. I also used Jim Holtz' recommendation on the 3/4" roundover.

                                          Mike

                                          Click image for larger version

Name:	DSCF1030.JPG
Views:	932
Size:	72.2 KB
ID:	850589

                                          Click image for larger version

Name:	DSCF1029.JPG
Views:	888
Size:	68.0 KB
ID:	850590

                                          Click image for larger version

Name:	DSCF1033.JPG
Views:	1781
Size:	67.8 KB
ID:	850591
                                          Last edited by theSven; 17 August 2023, 01:20 Thursday. Reason: Update image location

                                          Comment

                                          • mikela
                                            Member
                                            • Mar 2008
                                            • 98

                                            #22
                                            Speaker Gasket

                                            Question: Does the speaker gasket (Parts Express) go on the outside of the speaker screws i.e., along the outside perimeter of the speaker frame or on the inside of the screw next to the basket?

                                            Mike

                                            Comment

                                            • Jim Holtz
                                              Ultra Senior Member
                                              • Mar 2005
                                              • 3223

                                              #23
                                              Originally posted by mikela
                                              Question: Does the speaker gasket (Parts Express) go on the outside of the speaker screws i.e., along the outside perimeter of the speaker frame or on the inside of the screw next to the basket?

                                              Mike
                                              Hi Mike,

                                              The cabinets look great! :T

                                              The gasket goes between the driver and the baffle.

                                              Jim

                                              Comment

                                              • mikela
                                                Member
                                                • Mar 2008
                                                • 98

                                                #24
                                                Originally posted by Jim Holtz
                                                Hi Mike,

                                                The cabinets look great! :T

                                                The gasket goes between the driver and the baffle.

                                                Jim
                                                Thanks Jim...I am assuming you mean the track on the inside of the screws as opposed to the outside (or over screws)...both of which would end up between the baffle and the driver.

                                                Mike

                                                Comment

                                                • Jim Holtz
                                                  Ultra Senior Member
                                                  • Mar 2005
                                                  • 3223

                                                  #25
                                                  Originally posted by mikela
                                                  Thanks Jim...I am assuming you mean the track on the inside of the screws as opposed to the outside (or over screws)...both of which would end up between the baffle and the driver.

                                                  Mike
                                                  Hi Mike,

                                                  Sorry, I didn't understand. It doesn't make any difference whether it's inside the screw or outside the screw as long as it seals the driver to the baffle. Use what ever works.

                                                  Jim

                                                  Comment

                                                  • David_D
                                                    Senior Member
                                                    • Feb 2008
                                                    • 197

                                                    #26
                                                    Hi Mike,
                                                    Your cabinets are looking great!
                                                    I am glad you are pleased with the t-nut procedure.
                                                    Will they clear the drivers as they overhang slightly into the cutouts?
                                                    I clipped the flanges of the nuts on my center, but I never did try the drivers in before I snipped them.
                                                    -David

                                                    As we try and consider
                                                    We receive all we venture to give

                                                    Comment

                                                    • mikela
                                                      Member
                                                      • Mar 2008
                                                      • 98

                                                      #27
                                                      Hi David,

                                                      I used a Dremel tool grinder on one edge of the T-nut flanges on the ribbons. Each one is a custom job as I did not have the benefit of a drill press. Any ideas on an inexpensive drill press for this purpose? The T-nuts tend to rotate about an eighth of a turn as they are tapped into place due to the outside threads. In a couple of cases I had to grind them in situ because they rotated more or less than I anticipated. I have to fiddle a little bit to get the bolts to thread but someone in a rush could potentialy cross-thread them. I definitely like the solid mechanical feel. How did you clean up the threads? I just tried a number of them until I found ones that had little or no issues.

                                                      Mike

                                                      Comment

                                                      • David_D
                                                        Senior Member
                                                        • Feb 2008
                                                        • 197

                                                        #28
                                                        Originally posted by mikela
                                                        Hi David,

                                                        I used a Dremel tool grinder on one edge of the T-nut flanges on the ribbons. Each one is a custom job as I did not have the benefit of a drill press. Any ideas on an inexpensive drill press for this purpose? The T-nuts tend to rotate about an eighth of a turn as they are tapped into place due to the outside threads. In a couple of cases I had to grind them in situ because they rotated more or less than I anticipated. I have to fiddle a little bit to get the bolts to thread but someone in a rush could potentialy cross-thread them. I definitely like the solid mechanical feel. How did you clean up the threads? I just tried a number of them until I found ones that had little or no issues.

                                                        Mike
                                                        Hi Mike,
                                                        Yea, they do rotate as they are installed but, I found them pretty predictable in their rotation. I snipped the flange of the nut with a pair of linesman's pliers and offset the rotation amount before I drove them in.
                                                        As far as an inexpensive drill press... I don't have any real good suggestions as of yet. I would find a benchtop or preferably floor model that the table can move up & down a bit. Check Craig's List, I find them on there all the time. There is always Sears.
                                                        As far as the interior threads, I chased each nut with the same size tap.
                                                        BTW, what did you use to do the counterbores? Very nice job.
                                                        -David

                                                        As we try and consider
                                                        We receive all we venture to give

                                                        Comment

                                                        • mikela
                                                          Member
                                                          • Mar 2008
                                                          • 98

                                                          #29
                                                          I just happen to have a pair of linesmen pliers. I'll try that out on the next one. Also, went to our local B&B Hardware and picked up a die & tap set. What a difference that made...easily cleans up the threads on both nuts and bolts. :T

                                                          Comment

                                                          • mikela
                                                            Member
                                                            • Mar 2008
                                                            • 98

                                                            #30
                                                            Portable Drill Guide

                                                            Anybody use one of these before?

                                                            Comment

                                                            • David_D
                                                              Senior Member
                                                              • Feb 2008
                                                              • 197

                                                              #31
                                                              Originally posted by mikela
                                                              Any ideas on an inexpensive drill press for this purpose?
                                                              Hey Mike there is a 10" Craftsman Drill press listed on Craigslist for $50 in Brentwood.
                                                              -David

                                                              As we try and consider
                                                              We receive all we venture to give

                                                              Comment

                                                              • timdog
                                                                Junior Member
                                                                • Apr 2008
                                                                • 23

                                                                #32
                                                                Originally posted by mikela
                                                                I saw something like that in Harbor Freight, I think it was around $10 from them. I was tempted to get one to try out...but didn't. I have a cheap drill press that works decent for small jobs. That may be the ticket.

                                                                Tim

                                                                Comment

                                                                • mikela
                                                                  Member
                                                                  • Mar 2008
                                                                  • 98

                                                                  #33
                                                                  Originally posted by David_D
                                                                  Hey Mike there is a 10" Craftsman Drill press listed on Craigslist for $50 in Brentwood.
                                                                  Dave,

                                                                  Thanks for looking into that. It turns out that it is a benchtop model that just might work for me. I designed and built my own house (literally - except for some things like stucco) and had no idea that I might potentially become addicted to speaker building (I am already thinking of my next build). So I didn't anticipate the need for shop space. A benchtop might just work in my limited space 2 car garage.

                                                                  Mike

                                                                  Comment

                                                                  • mikela
                                                                    Member
                                                                    • Mar 2008
                                                                    • 98

                                                                    #34
                                                                    Originally posted by timdog
                                                                    I saw something like that in Harbor Freight, I think it was around $10 from them. I was tempted to get one to try out...but didn't. I have a cheap drill press that works decent for small jobs. That may be the ticket.

                                                                    Tim
                                                                    Tim,

                                                                    I went to Harbor Freight and found this http://www.harborfreight.com/cpi/cta...emnumber=95622 . For that price, it just might be worth a try. I'm just wondering how stable it would be hanging across an open speaker cut-out.

                                                                    Mike

                                                                    Comment

                                                                    • mikela
                                                                      Member
                                                                      • Mar 2008
                                                                      • 98

                                                                      #35
                                                                      To answer a question I missed...I used the tool recommended in the David D's T-nut evaluation thread https://www.htguide.com/forum/showthread.php?t=29922 to perform the counter bore. I also used a slight amount of counter sink inside the counter bore to ensure the T- nut fit flush against the 3/4" face. This is also described in that thread. Don't forget to order the 3/16" pilot bit with the counter bore tool.

                                                                      Also made progress on the other 2 baffles today:

                                                                      Click image for larger version  Name:	DSCF1035.JPG Views:	667 Size:	71.7 KB ID:	850647

                                                                      Click image for larger version  Name:	DSCF1037.JPG Views:	771 Size:	62.3 KB ID:	850648

                                                                      Click image for larger version  Name:	DSCF1038.JPG Views:	707 Size:	70.7 KB ID:	850649

                                                                      Click image for larger version  Name:	DSCF1034.JPG Views:	709 Size:	74.2 KB ID:	850650
                                                                      Last edited by theSven; 17 August 2023, 01:21 Thursday. Reason: Update image location and htguide url

                                                                      Comment

                                                                      • David_D
                                                                        Senior Member
                                                                        • Feb 2008
                                                                        • 197

                                                                        #36
                                                                        Originally posted by mikela
                                                                        To answer a question I missed...I used the tool recommended in the David D's T-nut evaluation thread https://www.htguide.com/forum/showthread.php?t=29922 to perform the counter bore. I also used a slight amount of counter sink inside the counter bore to ensure the T- nut fit flush against the 3/4" face. This is also described in that thread. Don't forget to order the 3/16" pilot bit with the counter bore tool.

                                                                        Also made progress on the other 2 baffles today:

                                                                        Click image for larger version Name:	DSCF1035.JPG Views:	667 Size:	71.7 KB ID:	850647

                                                                        Click image for larger version Name:	DSCF1037.JPG Views:	771 Size:	62.3 KB ID:	850648

                                                                        Click image for larger version Name:	DSCF1038.JPG Views:	707 Size:	70.7 KB ID:	850649

                                                                        Click image for larger version Name:	DSCF1034.JPG Views:	709 Size:	74.2 KB ID:	850650
                                                                        That's cool, I'm glad it worked for you.
                                                                        Sorry, I guess I just messed up there. I forgot to order the pilot also. I grabbed a 3/16" drill bit & locked it in the the spotfacer.
                                                                        BTW: The cabinet is coming along great!
                                                                        Last edited by theSven; 17 August 2023, 01:21 Thursday. Reason: Update quote
                                                                        -David

                                                                        As we try and consider
                                                                        We receive all we venture to give

                                                                        Comment

                                                                        • mikela
                                                                          Member
                                                                          • Mar 2008
                                                                          • 98

                                                                          #37
                                                                          David,

                                                                          Tapping out the T-nut threads is the real key to this process if you asked me. The threads have a tendency to gall. After cleaning them out, initial thread start and subsequent galling are not an issue at all. Thanks for investigating a better way to use T-nuts. ;x(

                                                                          Mike

                                                                          Comment

                                                                          • mikela
                                                                            Member
                                                                            • Mar 2008
                                                                            • 98

                                                                            #38
                                                                            Crossovers nearing completion

                                                                            Well it's been slow but crossovers are just about finished. I decided to mount the crossovers in the box even though I anticipate experimenting with the DEQX HDP-3 bypassing the crossovers. I will have 3 separate speaker terminations on the outside of the box. I am mounting the crossovers on small wood blocks that will just sit above the 1.25" Sonic Barrier material. The coils are oriented such that mid and tweeter crossovers can be mounted across from one another. The woofer crossover will be in the opposing end of the cabinet. Almost there :

                                                                            Mike

                                                                            Click image for larger version

Name:	DSCF1083.JPG
Views:	3865
Size:	70.5 KB
ID:	850766

                                                                            Click image for larger version

Name:	DSCF1084.JPG
Views:	3739
Size:	76.6 KB
ID:	850767

                                                                            Click image for larger version

Name:	DSCF1085.JPG
Views:	3686
Size:	74.7 KB
ID:	850768
                                                                            Last edited by theSven; 17 August 2023, 01:22 Thursday. Reason: Update image location

                                                                            Comment

                                                                            • FroDaddy
                                                                              Senior Member
                                                                              • Mar 2006
                                                                              • 274

                                                                              #39
                                                                              Originally posted by mikela
                                                                              Well it's been slow but crossovers are just about finished. I decided to mount the crossovers in the box even though I anticipate experimenting with the DEQX HDP-3 bypassing the crossovers. I will have 3 separate speaker terminations on the outside of the box. I am mounting the crossovers on small wood blocks that will just sit above the 1.25" Sonic Barrier material. The coils are oriented such that mid and tweeter crossovers can be mounted across from one another. The woofer crossover will be in the opposing end of the cabinet. Almost there :

                                                                              Mike
                                                                              Which crossovers are pictured here? The large statements or the center?

                                                                              Comment

                                                                              • mikela
                                                                                Member
                                                                                • Mar 2008
                                                                                • 98

                                                                                #40
                                                                                FroDaddy,

                                                                                These are for the large Statements. I have an SMX acoustically transparent screen and so will be using 3 identical Statements of the sealed variety in the same horizontal plane. If I had a flat panel situation or a non transparent screen then I would be building a Statement Center Channel. I have a Velodyne DD-18 which I will cross over to at 40Hz.

                                                                                Mike

                                                                                Comment

                                                                                • Curt C
                                                                                  Senior Member
                                                                                  • Feb 2005
                                                                                  • 791

                                                                                  #41
                                                                                  Originally posted by mikela
                                                                                  FroDaddy,

                                                                                  These are for the large Statements. I have an SMX acoustically transparent screen and so will be using 3 identical Statements of the sealed variety in the same horizontal plane. If I had a flat panel situation or a non transparent screen then I would be building a Statement Center Channel. I have a Velodyne DD-18 which I will cross over to at 40Hz.

                                                                                  Mike
                                                                                  I predict you will enjoy the fruits of your labors, Mike. The 6 RS225's across the front are going to give you some impressive tactile response. I know I was impressed with the pressure wave from just a pair of Statements. The third should be icing on the cake.

                                                                                  C
                                                                                  Curt's Speaker Design Works

                                                                                  Comment

                                                                                  • ahaik
                                                                                    Senior Member
                                                                                    • Feb 2007
                                                                                    • 233

                                                                                    #42
                                                                                    Originally posted by Curt C
                                                                                    I predict you will enjoy the fruits of your labors, Mike. The 6 RS225's across the front are going to give you some impressive tactile response. I know I was impressed with the pressure wave from just a pair of Statements. The third should be icing on the cake.

                                                                                    C
                                                                                    Hi Curt,
                                                                                    I have a question about the use of the third statement as a center.
                                                                                    I remember Jim mentioning that they Where designed not to be toed in. When
                                                                                    mine where first setup I had them toed in and I remember them being more forward. When I set them straight they sounded so much better.
                                                                                    Just wondering about that, since the center would be on axis.
                                                                                    Oh, and BTW my brother purchased a used Aragon 8008BB and we tried it with the Statements, what a difference from my Parasound HCA-2000II
                                                                                    Bass is much more controlled and dynamics improved significantly, the transitions are so much faster. The Statements have so much in them and they respond to every upgrade I throw at them.
                                                                                    Thank you again Jim and curt for this great design :T

                                                                                    Asi.

                                                                                    Comment

                                                                                    • Curt C
                                                                                      Senior Member
                                                                                      • Feb 2005
                                                                                      • 791

                                                                                      #43
                                                                                      Originally posted by ahaik
                                                                                      Hi Curt,
                                                                                      I have a question about the use of the third statement as a center.
                                                                                      I remember Jim mentioning that they Where designed not to be toed in. When
                                                                                      mine where first setup I had them toed in and I remember them being more forward. When I set them straight they sounded so much better.
                                                                                      Asi.
                                                                                      Good point Asi. :T
                                                                                      It is possible that some minor tweaking of the mid and tweeter networks may be necessary. Likely small adjustments to the mid and tweeter shunt resistors would bring things back into line. In addition, the effects of the acoustically transparent (you know is isn't) screen should be considered as well. Perhaps one will fortuitously compensate for the other. :W

                                                                                      C
                                                                                      Curt's Speaker Design Works

                                                                                      Comment

                                                                                      • mikela
                                                                                        Member
                                                                                        • Mar 2008
                                                                                        • 98

                                                                                        #44
                                                                                        Originally posted by Curt C
                                                                                        I predict you will enjoy the fruits of your labors, Mike. The 6 RS225's across the front are going to give you some impressive tactile response. I know I was impressed with the pressure wave from just a pair of Statements. The third should be icing on the cake.

                                                                                        C
                                                                                        Curt,

                                                                                        I'm really looking forward to hearing these for the first time. After listening to my Magnepans, I'm sure I will be impressed with the dynamics and hopefully other areas as well. The building experience itself has been alot of fun...not to mention the great excuse to buy more tools :W Unfortunately, competition with the "honey do" list is always an issue

                                                                                        Mike

                                                                                        Comment

                                                                                        • mikela
                                                                                          Member
                                                                                          • Mar 2008
                                                                                          • 98

                                                                                          #45
                                                                                          Originally posted by ahaik
                                                                                          Hi Curt,
                                                                                          I have a question about the use of the third statement as a center.
                                                                                          I remember Jim mentioning that they Where designed not to be toed in. When
                                                                                          mine where first setup I had them toed in and I remember them being more forward.
                                                                                          Asi.
                                                                                          Asi,

                                                                                          This is something I have not condsidered. ops: This may be the forcing function that moves me toward crossover design on my DIY speaker journey.

                                                                                          Mike

                                                                                          Comment

                                                                                          Working...
                                                                                          Searching...Please wait.
                                                                                          An unexpected error was returned: 'Your submission could not be processed because you have logged in since the previous page was loaded.

                                                                                          Please push the back button and reload the previous window.'
                                                                                          An unexpected error was returned: 'Your submission could not be processed because the token has expired.

                                                                                          Please push the back button and reload the previous window.'
                                                                                          An internal error has occurred and the module cannot be displayed.
                                                                                          There are no results that meet this criteria.
                                                                                          Search Result for "|||"