David's InDIYana 2024 "Inner Sanctum" theme Build.

Collapse
X
 
  • Time
  • Show
Clear All
new posts
  • DaveFred
    Senior Member
    • Sep 2018
    • 179

    David's InDIYana 2024 "Inner Sanctum" theme Build.

    Hello,

    Once again I have decided to throw my hat into the Ring known as InDIYana, and as usual, I don't really know what I am doing.

    ^The most important part of that is, my Wife has once agreed to drive 6 hours/300 miles across an International border to attend with me.

    I must be thicker than the average bear, because I don't think I really understand all the rules, but Ben has said my plans for a coaxial tweeter/mid and pair of midwoofer isobaric style meet the theme criterion, so here we are.
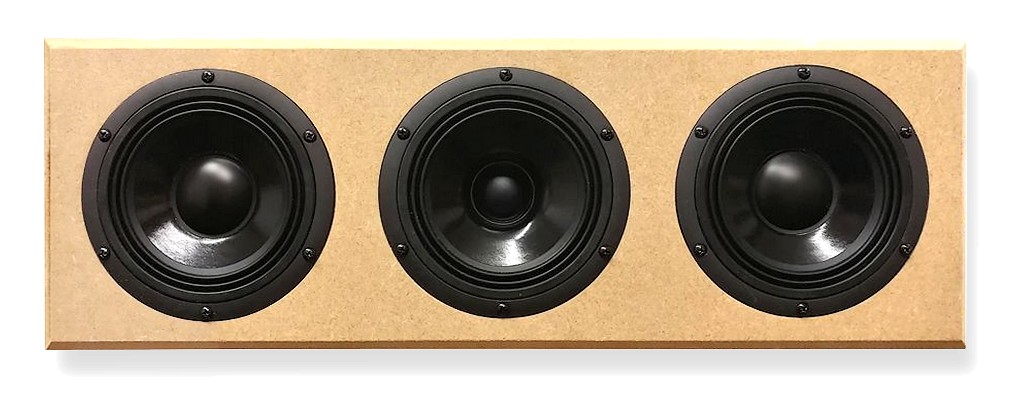
    Drivers are,

    2x,
    Sica 6,5 C 1,5 CP
    Coaxial unit for HiFi and Studio Monitor
    Code: Z004102
    Nominal overall diameter: 6.5″
    Nominal voice coil diameter: LF 1.5″ / HF 1″
    Magnet material: LF Ferrite / HF Neodymium
    Basket material: Aluminium Die-Cast
    Power: 240 W
    Sensitivity: LF 91.0 dB / HF 93.9 dB
    Frequency range: 55-18000 Hz

    4x,
    Sica 6,5 H 1,5 CP
    Hi-Fi / Studio Monitor
    Code: Z004100
    Nominal overall diameter: 6.5″
    Nominal voice coil diameter: 1.5″
    Magnet material: Ferrite
    Basket material: Aluminium Die-Cast
    Power: 240 W
    Sensitivity: 89.4 dB
    Frequency range: 40-4500 Hz

    There is an overall plan (more of an outline) in my head for what I want to do, but most of the specifics are still to be worked out.

    Baffle is to be 1.5" bamboo made from a stock shelf item at a local building centre, edges are going to get a 1.5" roundover, so with the woofers frame being almost 7", that gives me a baffle width of 10-11 inches'ish. Coax and woofer share the same basket dimensions. Coax will be mounted as close to the top of the baffle as possible with no edge treatment on the top edge.

    Distance between woofer and coax will be whatever it needs to be. Not sure how much to chamfer backs of the baffle around the woofer for enough breathing room, nor how big the enclosure behind the midwoofer needs to be to attach the second isobaric woofer behind it. These two things will have a lot to do with overall enclosure height, and overall box dimensions cannot be determined until I work these two things out.

    Box material will be a semi normal 3/4" Baltic birch box with separate chambers for coax and woofer sections, one solid brace between. Two removable panels on the back to get into box for XO, wiring, port tuning etc.. Veneer sides, either bamboo, walnut or cherry, not sure yet. No translam this year, too expensive, too time consuming and mostly too heavy,

    Once I decide on how much the drivers need to breathe, then I can build the isobaric back chamber, then I can design a box around what those need to be. Not very good at planning all this out in advance, just take one step at a time and see where I end up.

    My understanding of one of the major drawbacks to Coaxial speakers is intermodulation distortion caused by the woofer surrounding the tweeter, so I hope can limit its extension by crossing it over to the midwoofers beneath it around 400-600Hz. This will be instead of running the woofer coax full range (no high pass) and using the isobaric midwoofers as the .5 in a 2.5. I know sensitivity will take a big hit with this plan, but it's the plan.

    Let the building commence,

    Click image for larger version  Name:	6 Sica drivers.jpg Views:	0 Size:	447.7 KB ID:	951413


    Click image for larger version  Name:	starting layout 2.jpg Views:	0 Size:	318.5 KB ID:	951414Click image for larger version  Name:	starting layout 3.jpg Views:	0 Size:	346.1 KB ID:	951415
    Last edited by DaveFred; 02 March 2024, 11:00 Saturday.
  • theSven
    Master of None
    • Jan 2014
    • 1059

    #2
    I'm looking forward to seeing more of your amazing woodworking skills for this build! What is the date to for the InDIYana 2024? I would like to get a post up for this in the red carpet channel on the forum.
    Painter in training

    Comment

    • duvixan
      Member
      • Sep 2012
      • 56

      #3
      I found a similar design, but with the 5.5" drivers
      "Leg ihn um!" - Zugegeben, diese Aufforderung könnte man an anderer Stelle durchaus falsch verstehen. Nicht aber im Zusammenhang mit der "Focus", in deren Zentrum sich ein noch recht neu auf dem DIY-Markt erhältliches Koaxialchassis des italienischen Spezialisten Sica befindet. Genau dieses macht aus der im folgenden beschriebenen Lautsprecherbox ein kleines Universalgenie. Stehend, etwa auf ...


      4-600hz sounds quite high for a 6.5" driver, won't ~300hz be enough to limit excursion?

      *Edit: My bad, didn't notice it's isobaric, not d'appolito

      Comment

      • DaveFred
        Senior Member
        • Sep 2018
        • 179

        #4
        Originally posted by theSven
        I'm looking forward to seeing more of your amazing woodworking skills for this build! What is the date to for the InDIYana 2024? I would like to get a post up for this in the red carpet channel on the forum.
        Ben posted about it in another thread not too long ago,

        World-class audio meets mid-western show and tell with great ingenuity! What: The 17th annual InDIYana speaker-DIY event! (2020 is the only missing year since 2007.)

        Comment

        • DaveFred
          Senior Member
          • Sep 2018
          • 179

          #5
          First things first, I need to decide how to mount the "inside" woofer, what that is going to look like and how much space it will take up so I can figure out an enclosure size for this project.

          Make a sample 1.5" baffle and mount a woofer in it to see what the back of it will look like, then see how much back bevel to give the front woofer so it can "breathe".

          First attempt was with a 45º chamfer, but that seemed to generate too big an opening in the 1.5" thick baffle I plan on using, so I tried again with a 30º degree chamfer bit, and that seemed just right.

          Now that I know what that looks like, I can make an enclosure that fits behind the front woofer and that the rear woofer can attach to. Just started with some circles 2" bigger than the baffles woofer back bevel opening, cut the same basket clearance hole in them, rebate for the rear woofer to "sit" into the chamber, and then bevel the end that mates to the baffle it to match the bevel on the back of the baffle. Writing this seems so straight forward, yet I spent hours thinking about how to go about this and changed tack a few times as I was going about it.

          With the rear woofer mounts done, I can plan for an enclosure...


          Click image for larger version

Name:	woofer test fit.jpg
Views:	550
Size:	436.6 KB
ID:	951471

          Click image for larger version

Name:	woofer no breathe 1.jpg
Views:	547
Size:	416.0 KB
ID:	951472

          Click image for larger version

Name:	i like 30 dgree better.jpg
Views:	553
Size:	491.9 KB
ID:	951473
          Click image for larger version

Name:	rebate for iso woofer.jpg
Views:	554
Size:	485.5 KB
ID:	951474
          ​​​Click image for larger version

Name:	glue up  iso stack.jpg
Views:	549
Size:	359.9 KB
ID:	951475

          Click image for larger version

Name:	chamfer stack to match baffle.jpg
Views:	555
Size:	623.6 KB
ID:	951476

          Click image for larger version

Name:	stack2.jpg
Views:	556
Size:	400.3 KB
ID:	951477

          Click image for larger version

Name:	second woofer on stack.jpg
Views:	550
Size:	425.9 KB
ID:	951478

          Click image for larger version

Name:	now can layout baffle.jpg
Views:	551
Size:	382.9 KB
ID:	951479​​​​​

          Comment

          • JonMarsh
            Mad Max Moderator
            • Aug 2000
            • 15284

            #6
            I suspect Technodanvan will be following this closely, due to his interest in SICA drivers... especially the coax's!

            Baffle is to be 1.5" bamboo made from a stock shelf item at a local building centre, edges are going to get a 1.5" roundover, so with the woofers frame being almost 7", that gives me a baffle width of 10-11 inches'ish.
            You know, I've seen quite a bit of "interesting" hardwoods at certain local big box stores, material pitched for table tops especially. I've gotten in a bit of a rut using some bamboo from desktops at Amazon...

            Rest assured, many of us will live vicariously following the details of your build!
            the AudioWorx
            Natalie P
            M8ta
            Modula Neo DCC
            Modula MT XE
            Modula Xtreme
            Isiris
            Wavecor Ardent

            SMJ
            Minerva Monitor
            Calliope
            Ardent D

            In Development...
            Isiris Mk II updates- in final test stage!
            Obi-Wan
            Saint-Saëns Symphonique/AKA SMJ-40
            Modula PWB
            Calliope CC Supreme
            Natalie P Ultra
            Natalie P Supreme
            Janus BP1 Sub


            Resistance is not futile, it is Volts divided by Amperes...
            Just ask Mr. Ohm....

            Comment

            • technodanvan
              Super Senior Member
              • Nov 2009
              • 1024

              #7
              Is it weird that I just like the bolt pattern on the Sica 6.5s? I mean, I'm sure the driver itself is very nice, but that's secondary (sort of).

              Looking really, really nice Dave!
              - Danny

              Comment

              • DaveFred
                Senior Member
                • Sep 2018
                • 179

                #8
                Enclosure,

                Normally I don't worry about driver displacement in my enclosures because I am frequently using 1.5" thick baffles, and by the time I chamfer the back of the baffle to let the woofer breathe, the space "carved out" of the baffle is about what the driver displaces. This time, with the cylinder behind the front woofer, I needed to know what the displacement of that cylinder was and then add bit for the 2nd woofer before figuring out enclosure size. Cylinder is 8-5/8" dia x 2-1/8" thick, or about 2 liters displacement, going to guess under a liter displacement for the 2nd woofer. Before I set out to actually build the iso woofer adapter, I didn't really have an idea what volume it would take up, turns out, in the end, wasn't as big as I thought it might be.

                Click image for larger version

Name:	four woofers.jpg
Views:	520
Size:	378.6 KB
ID:	951500

                Decided to measure all four woofers raw out of the box, and then after running them for 30 minutes high excursion at 30 hz.

                Click image for larger version

Name:	Sica 6 inch woofer ts specs chart.jpg
Views:	503
Size:	120.5 KB
ID:	951501

                Then run some sims with the three sets of data,

                Data not shown for Unibox, 10 watts input power, 2 drive units in parallel, compound, no external components

                Cold avg.,

                Click image for larger version

Name:	Sica 6 inch woofer specs dats raw.jpg
Views:	505
Size:	204.8 KB
ID:	951502

                Warm avg.,

                Click image for larger version

Name:	Sica 6 inch woofer specs dats run in.jpg
Views:	496
Size:	202.9 KB
ID:	951503

                Data sheet,

                Click image for larger version

Name:	Sica 6 inch woofer specs dats data sheet.jpg
Views:	501
Size:	208.4 KB
ID:	951504

                Going to shoot for 20 liters for woofer enclosure before all deductions like port tube, XO, 2nd woofer, etc.

                Time to cut some plywood...​

                Comment

                • DaveFred
                  Senior Member
                  • Sep 2018
                  • 179

                  #9
                  It has been a few days since I have posted an update on my InDIYana Iso build, lots of separate parts are being worked on at the same time, but not enough in one area to bother posting about.

                  The cabinet is starting to come together. It is made from 3/4" Baltic Birch and I am using my standard lock rebate joint to connect the top/middle/bottom to the sides. I just use a 1/8" full kerf 24 tooth flat top grind rip blade as a 1/8" dado blade to made a 1/8"x1/8" grove in the sides and to leave a 1/8"x1/8" tab on the sides to making gluing up easier, things squirm around less. I also break down the glue up, by only gluing one side at a time. It only takes 20 minutes in the clamps, so do one half of one, go do the first half of the other, go back, etc. Makes for less stress if you only have to worry about one side at a time. The grooves for the top and bottom were deliberately made about 1/16" in from the edge of the top and bottom to be flush trimmed off.

                  Looks like the veneer for this project is going to be walnut, but I don't want to veneer the back, but I also didn't want the rear ply edge showing, and I hate iron on edge banding. Decided to make some solid walnut edging and attach it with the CMT ply edge set.

                  Lastly, you can see an additional groove all the way around the the inside on the rear of the box, that will be for the bits that the removable back attach to. More on that later...

                  P.S. Still working on a name for this project...

                  Click image for larger version

Name:	cutting panels.jpg
Views:	477
Size:	372.3 KB
ID:	951556

                  Click image for larger version

Name:	cutting tabs.jpg
Views:	466
Size:	264.1 KB
ID:	951557

                  Click image for larger version

Name:	panels all cut and tabbed.jpg
Views:	475
Size:	382.4 KB
ID:	951558

                  Click image for larger version

Name:	gluing up cab.jpg
Views:	470
Size:	433.4 KB
ID:	951559
                  Click image for larger version

Name:	gluing up cab 2.jpg
Views:	472
Size:	445.8 KB
ID:	951560
                  Click image for larger version

Name:	making walnut edging.jpg
Views:	469
Size:	542.2 KB
ID:	951561
                  Click image for larger version

Name:	close up of edging.jpg
Views:	473
Size:	193.0 KB
ID:	951563

                  Click image for larger version

Name:	gluing on edging.jpg
Views:	473
Size:	471.5 KB
ID:	951562

                  ​​​Click image for larger version

Name:	triming cabinet edges flush.jpg
Views:	467
Size:	419.7 KB
ID:	951564
                  Click image for larger version

Name:	all flush cabinet and edging.jpg
Views:	470
Size:	376.4 KB
ID:	951565
                  Click image for larger version

Name:	laying out for back frame.jpg
Views:	463
Size:	296.2 KB
ID:	951566

                  Comment

                  • technodanvan
                    Super Senior Member
                    • Nov 2009
                    • 1024

                    #10
                    MuSICAlities
                    WhimSICAls
                    PhySICAlities
                    IntrinSICAlities
                    ClasSICAls
                    MuSICAles

                    I might be stuck on a theme. Looking great as always - I might consider making these if my woodworking skills were up to the task.
                    - Danny

                    Comment

                    • DaveFred
                      Senior Member
                      • Sep 2018
                      • 179

                      #11
                      Today's update couldn't be more boring, it is about the back of the speaker cabinet.

                      Normally, it would consist of, "I glued the back on".

                      By why do something so simple, when there are many ways to make it as complicated as possible?

                      As per my normal, I went the second route.

                      The back needs to be removable for a couple of reasons, mainly to get the second isobaric woofer installed and wired. Also helps with installing the crossover and port tuning. Simple way would be to use wood screws to install the back, but I went for threaded inserts and furniture screws to hold the back on.

                      You will have seen the 1/8"x1/8" groove all the way around the inside rear of the cabinet, that was so I could glue in the bits that would make the rear frame the back would attach to.

                      Furniture screws have a shallow 11/16" dia countersink in the back panels with a 1/4" through hole internally chamfered.

                      Holes from back panels were transfered to back frame by drilling through back panels, centered with shims.

                      In order to make sure 1/4" holes were concentrically enlarged to 7/16" for threaded inserts without wandering, a step bit was used to get to the correct diameter, followed by a 7/16" normal drill bit to through drill full depth, holes were also internally chamfered so threaded inserts would sit slightly below the surface.

                      Took a few iterations to come up with a rear terminal cup bass reflex port layout. Originally in my mind I was going to make a fancy recessed built in terminal cup, but realized wires from XO to rear terminals would have to be attached before the back went on (the wires would be long) since there was no access from the front woofer cut out. Ditched that idea and went with pedestrian 3" diameter premade cups. These would allow me to pass the XO wire out the back with just a little bit of slack to attach to the terminal cup before securing. Terminal cups are attached with #6 button head socket cap screws through to Tee Nuts. Everyone hates Tee-Nuts and has a horror story about them popping off. Securing them with a pair of #4 1/2" screws should make sure that never happens.

                      I did mix up some 30 minute epoxy and spread alot of it around the large threaded inserts that flowed down into and around their threads, I don't think they will be going anywhere.

                      Internal block for bass reflex pipe to attach to was glued on, drilled out, flush trimmed to pipe and externally rounded over with a 1" roundover bit.

                      I can make anything complicated.

                      Baffle is next...

                      Click image for larger version

Name:	gluing in back frame.jpg
Views:	423
Size:	354.0 KB
ID:	951594
                      Click image for larger version

Name:	back frame glued in.jpg
Views:	404
Size:	332.9 KB
ID:	951595

                      Click image for larger version

Name:	back bolt pattern.jpg
Views:	405
Size:	368.1 KB
ID:	951596
                      Click image for larger version

Name:	drilling for back holes 1.jpg
Views:	414
Size:	403.7 KB
ID:	951597
                      Click image for larger version

Name:	back panel holes to back frame.jpg
Views:	406
Size:	393.2 KB
ID:	951598
                      Click image for larger version

Name:	quarter inch to seven sixteenths enlarge.jpg
Views:	408
Size:	364.7 KB
ID:	951599
                      Click image for larger version

Name:	threaded inserts in everything lines up and fits.jpg
Views:	408
Size:	486.4 KB
ID:	951600
                      Click image for larger version

Name:	laying out for port and terminal cups.jpg
Views:	409
Size:	419.2 KB
ID:	951601
                      Click image for larger version

Name:	everyone one hates tee nuts.jpg
Views:	404
Size:	372.1 KB
ID:	951602
                      Click image for larger version

Name:	gluing on port extension.jpg
Views:	415
Size:	310.5 KB
ID:	951603
                      Click image for larger version

Name:	glue for threaded inserts.jpg
Views:	408
Size:	313.7 KB
ID:	951604
                      Click image for larger version

Name:	liberal epoxy around inserts.jpg
Views:	417
Size:	371.9 KB
ID:	951605
                      Click image for larger version

Name:	pocket for 2 inch port pipe.jpg
Views:	416
Size:	359.6 KB
ID:	951606
                      Click image for larger version

Name:	flush trim port opening to pipe id.jpg
Views:	403
Size:	415.8 KB
ID:	951607

                      Click image for larger version

Name:	roundover port exit one inch.jpg
Views:	404
Size:	459.8 KB
ID:	951608


                      Comment

                      • DaveFred
                        Senior Member
                        • Sep 2018
                        • 179

                        #12
                        Should up the number of allowable attachments

                        Click image for larger version

Name:	backs done 1.jpg
Views:	419
Size:	431.7 KB
ID:	951610
                        Click image for larger version

Name:	backs done 2.jpg
Views:	400
Size:	414.4 KB
ID:	951611

                        Comment

                        • DaveFred
                          Senior Member
                          • Sep 2018
                          • 179

                          #13
                          Time for another tedious update on my Sica iso speaker build,

                          My plan to use a prefab 1-1/2" bamboo shelf for a baffle fell through when once I started to machine it, the interior was full of random voids. I had already picked up bamboo veneer for the sides as well.

                          Crap.

                          What can I do next on short notice that isn't going to cost more money? I have on hand some split live edge walnut and a half sheet of left over Baltic Birch? Translam front and shop made walnut veneer for the sides!

                          Pics of gluing up translam baffle, laying out baffle, routing in for drivers, attaching second isobaric woofer chamber/holder, installing M4 threaded inserts into the baffle to hold drivers, lapping the box flat on giant sanding block before gluing on baffle, some dowels here and there to things align during glue up so they don't slide around and finally using a solid carbide spiral upcut bit to flush trim the baffle to the box sides.

                          Next up, Walnut Veneer...


                          Click image for larger version

Name:	gluelam baffle glueup.jpg
Views:	334
Size:	522.0 KB
ID:	951748

                          Click image for larger version

Name:	drumsand baffle 1.jpg
Views:	327
Size:	506.9 KB
ID:	951752

                          Click image for larger version

Name:	drum sand baffle 2.jpg
Views:	335
Size:	429.8 KB
ID:	951750

                          Click image for larger version

Name:	layout baffle front and back.jpg
Views:	331
Size:	503.4 KB
ID:	951751

                          Click image for larger version

Name:	set basket lip depth 11-64 drill bit.jpg
Views:	331
Size:	399.6 KB
ID:	951749

                          Click image for larger version

Name:	routeing out baffle for drivers.jpg
Views:	327
Size:	470.2 KB
ID:	951753

                          Click image for larger version

Name:	chamfer back of baffle.jpg
Views:	335
Size:	534.9 KB
ID:	951754

                          Click image for larger version

Name:	second iso woofer layout.jpg
Views:	330
Size:	486.4 KB
ID:	951759

                          Click image for larger version

Name:	woofer nut inserts.jpg
Views:	327
Size:	418.7 KB
ID:	951756

                          Click image for larger version

Name:	layout for dowels iso chamber.jpg
Views:	327
Size:	412.2 KB
ID:	951755

                          Click image for larger version

Name:	iso chamber dowels.jpg
Views:	332
Size:	474.2 KB
ID:	951757

                          Click image for larger version

Name:	iso chamber glue on.jpg
Views:	337
Size:	446.7 KB
ID:	951758

                          Click image for larger version

Name:	important iso wire hole.jpg
Views:	330
Size:	506.3 KB
ID:	951760

                          Click image for larger version

Name:	lap cabinet flat.jpg
Views:	334
Size:	565.2 KB
ID:	951762

                          Click image for larger version

Name:	lap cabinet fla 2t.jpg
Views:	330
Size:	536.6 KB
ID:	951761

                          Comment

                          • DaveFred
                            Senior Member
                            • Sep 2018
                            • 179

                            #14
                            Need higher pic per post limit...

                            Click image for larger version

Name:	dowels for baffle 1.jpg
Views:	328
Size:	390.1 KB
ID:	951767

                            Click image for larger version

Name:	glue on baffle 1.jpg
Views:	343
Size:	333.1 KB
ID:	951764

                            Click image for larger version

Name:	boxes in clamps.jpg
Views:	333
Size:	580.1 KB
ID:	951769

                            Click image for larger version

Name:	boxes out of clamps.jpg
Views:	336
Size:	421.5 KB
ID:	951766

                            Click image for larger version

Name:	spiral flush trim.jpg
Views:	337
Size:	413.1 KB
ID:	951765

                            Click image for larger version

Name:	ready for veneer next.jpg
Views:	329
Size:	448.0 KB
ID:	951768

                            Comment

                            • DaveFred
                              Senior Member
                              • Sep 2018
                              • 179

                              #15
                              Work on the as of yet unnamed InDIYana 2024 isobaric project continues,

                              To go back a bit, the baffle was to be Bamboo, but the Bamboo shelf I bought to use as a baffle was riddled with random voids, so I switched to a Translam baffle. The sides were going to be Bamboo veneer, but I thought it looked too busy with the Translam front, so I decided to use some walnut I had kicking around to cover the Baltic Birch plywood. Plans change.

                              Last time I was at my favorite local sawmill, I picked up a bunch of random 6/4 live edge walnut boards to add to the stash for future use. Just as an aside, I have a great disfondness for epoxy encased live edge anything so saving boards from such a fate seems like a good deed right off the bat.

                              Pics of the board as retrieved from the basement, it didn't take much to make the split from the top and bottom connect and separate the board into two boards.

                              Boards were cut to length and resawn once for the first book match.

                              Once glued up, they were resawn again to make book matched book matched panels (bookmatched^2?).

                              Ran them all through the drum sander.

                              Monkeyed around with the layout, decided to make it so the left sides on both are the same and the rights on both are the same, as opposed to the left/right of each speaker being the same (if that makes sense).

                              I like to use a j-roller to spread out large amounts of glue, goes quicker and more evenly.

                              Used a torsion box for a ghetto cold press.

                              As per normal, trimmed things with a solid spiral flush trim bit. I prefer to do this in a table as opposed to free hand, I can easily limit the depth of cut per pass with the fence (usually just 1/8" max trim per pass) and things don't get away from my like they can free hand with a hand held router.

                              Used a Freud 1.5" roundover bit on the vertical front edges of the box. Took about 4 passes to full depth to be safe.

                              I was concerned how the 3/32" veneer would look at the top and bottom framing the translam, but I like how the look turned out.

                              Couple pics of the boxes all sanded and also showing the removable backs without port or terminal cups.

                              Next up, Applying finish....


                              Click image for larger version

Name:	Walnut board.jpg
Views:	282
Size:	415.5 KB
ID:	951804
                              Click image for larger version

Name:	split walnut board.jpg
Views:	283
Size:	542.2 KB
ID:	951802
                              Click image for larger version

Name:	resawn walnut once.jpg
Views:	285
Size:	545.6 KB
ID:	951805
                              Click image for larger version

Name:	walnut glueup.jpg
Views:	290
Size:	403.6 KB
ID:	951800
                              Click image for larger version

Name:	second resaw.jpg
Views:	276
Size:	473.8 KB
ID:	951801
                              Click image for larger version

Name:	walnut panels sanded.jpg
Views:	279
Size:	557.5 KB
ID:	951803
                              Click image for larger version

Name:	laying out panels.jpg
Views:	282
Size:	460.5 KB
ID:	951808
                              Click image for larger version

Name:	ghetto coldpress.jpg
Views:	282
Size:	477.0 KB
ID:	951806
                              Click image for larger version

Name:	glue for side panel.jpg
Views:	286
Size:	346.9 KB
ID:	951812
                              Click image for larger version

Name:	side panels glued on.jpg
Views:	276
Size:	467.7 KB
ID:	951807
                              Click image for larger version

Name:	walnut spiral flush trim edges.jpg
Views:	277
Size:	2.44 MB
ID:	951814
                              Click image for larger version

Name:	all panels flush trimmed.jpg
Views:	281
Size:	492.1 KB
ID:	951813
                              Click image for larger version

Name:	a little roundover.jpg
Views:	288
Size:	436.3 KB
ID:	951809
                              Click image for larger version

Name:	rounded over.jpg
Views:	279
Size:	505.1 KB
ID:	951810
                              Click image for larger version

Name:	me sanding.jpg
Views:	284
Size:	324.6 KB
ID:	951811


                              Comment

                              • DaveFred
                                Senior Member
                                • Sep 2018
                                • 179

                                #16
                                Need more than 15 pics per post please...

                                Click image for larger version

Name:	sanded 1.jpg
Views:	285
Size:	453.5 KB
ID:	951818
                                Click image for larger version

Name:	sanded 2.jpg
Views:	286
Size:	454.5 KB
ID:	951817
                                Click image for larger version

Name:	sanded back.jpg
Views:	291
Size:	433.4 KB
ID:	951816

                                Comment


                                • theSven
                                  theSven commented
                                  Editing a comment
                                  OK will look into that this week wink

                                • JonMarsh
                                  JonMarsh commented
                                  Editing a comment
                                  I hear ya, BTT! (Been There Too). Sometimes I just split stuff up in to several posts and try to put together a logical narrative for the sequence. Nice work you're doing... keep it coming! However many posts it takes!
                              • DaveFred
                                Senior Member
                                • Sep 2018
                                • 179

                                #17
                                Not a whole lot to say in this update,

                                - applied two coats of Osmo oil to the boxes
                                - put some 2" wool batting on the inside of the boxes
                                - installed the drivers so I could start measuring for a crossover (upper back is a dummy back with two terminal cups just for measuring)

                                This is all the easy stuff done, now to measure all three drivers and come up with a Crossover!
                                Click image for larger version

Name:	starting cabinet finish 1.jpg
Views:	410
Size:	441.3 KB
ID:	951938

                                Click image for larger version

Name:	cabinet backs finish.jpg
Views:	242
Size:	404.9 KB
ID:	951944

                                Click image for larger version

Name:	starting cabinet finish 2.jpg
Views:	240
Size:	391.3 KB
ID:	951943
                                Click image for larger version

Name:	starting cabinet finish 3.jpg
Views:	317
Size:	496.2 KB
ID:	951941

                                Click image for larger version

Name:	starting cabinet finish 4.jpg
Views:	355
Size:	474.0 KB
ID:	951940
                                Click image for larger version

Name:	osmo oil.jpg
Views:	406
Size:	325.0 KB
ID:	951939
                                Click image for larger version

Name:	wool 1.jpg
Views:	321
Size:	503.1 KB
ID:	951942
                                Click image for larger version

Name:	wool 2.jpg
Views:	243
Size:	504.2 KB
ID:	951947

                                Click image for larger version

Name:	one woofer in.jpg
Views:	238
Size:	432.7 KB
ID:	951945
                                Click image for larger version

Name:	2nd woofer in.jpg
Views:	243
Size:	522.3 KB
ID:	951946
                                Click image for larger version

Name:	drivers installed.jpg
Views:	241
Size:	547.2 KB
ID:	951950
                                Click image for larger version

Name:	drivers installed 2.jpg
Views:	240
Size:	468.9 KB
ID:	951948

                                Click image for larger version

Name:	back on temp top back.jpg
Views:	235
Size:	487.9 KB
ID:	951949

                                Comment


                                • JonMarsh
                                  JonMarsh commented
                                  Editing a comment
                                  Great looking work! Wish I'd have a chance to hear these!
                                  And yeah, next comes the fun part! Wires and sparks!
                              • technodanvan
                                Super Senior Member
                                • Nov 2009
                                • 1024

                                #18
                                Just flawless work; beautiful stuff as always!
                                - Danny

                                Comment

                                • DaveFred
                                  Senior Member
                                  • Sep 2018
                                  • 179

                                  #19
                                  Measurement time,

                                  Any suggestions or hints about the XO would be appreciated.

                                  I have yet to listen to the XO, so I have no idea if this will be okay or sound like crap yet, parts are supposed to arrive tomorrow and then I can start to play around in the real world. About 1 week left, no rush, no pressure...

                                  Yes, I am using high DCR air coils, I have other options in the tool box if this turns out to be a bad idea.

                                  I was trying to keep the parts count down for the mid and tweeter as space is limited for where I wanted to put the board with those components. I did have more complex versions of the XO, but this was the least amount of parts I could use and still be happy. Might not have needed fourth order electrical on the woofer, but I have lots of space in the bottom compartment and wasn't as thrifty with the Iso woofer low pass circuit.

                                  If anyone wants to play along at home and take a crack at the XO, I have attached all measurements. You can see from my XO that the woofer is -225mm on Y axis from the tweeter, tweeter and mid being a coax are concentric with no offset. Measurements are dual channel with time of flight recorded in each measurement so no Z offsets are required.

                                  Comments good or bad welcomed!

                                  Click image for larger version  Name:	Measurement time.jpg Views:	2 Size:	361.7 KB ID:	951977

                                  Click image for larger version  Name:	raw coax tweeter.jpg Views:	2 Size:	301.0 KB ID:	951978Click image for larger version  Name:	raw coax mid.jpg Views:	2 Size:	340.8 KB ID:	951979Click image for larger version  Name:	raw iso woofer.jpg Views:	2 Size:	332.3 KB ID:	951980
                                  Click image for larger version  Name:	tentative xo April 16 2024.jpg Views:	2 Size:	67.1 KB ID:	951981

                                  Click image for larger version  Name:	directivity.jpg Views:	1 Size:	329.4 KB ID:	951982
                                  Click image for larger version  Name:	Power and Directivity.jpg Views:	1 Size:	311.8 KB ID:	951983
                                  Click image for larger version  Name:	filter slopes.jpg Views:	1 Size:	218.1 KB ID:	951984


                                  Click image for larger version  Name:	responces.jpg Views:	1 Size:	277.6 KB ID:	951985

                                  Click image for larger version  Name:	phase.jpg Views:	7 Size:	238.1 KB ID:	951989
                                  ​​
                                  ​​​Click image for larger version  Name:	impedance.jpg Views:	1 Size:	222.4 KB ID:	951987

                                  Attached Files
                                  Last edited by theSven; 17 April 2024, 00:07 Wednesday. Reason: remove duplicate image

                                  Comment

                                  • technodanvan
                                    Super Senior Member
                                    • Nov 2009
                                    • 1024

                                    #20
                                    Hey Dave, a few thoughts in no particular order.

                                    The tweeter appears to have two peaks in its response at around 8.7kHz and maybe 13kHz or so, which creates a trough at ~11kHz. This carries forward into the crossover and results in a 4-7dB swing depending on frequency. I imagine that would be audible. I'm sure you have seen this and are working diligently on it already! Edit to this comment: I saw your post over at MAC/DIY and some of the responses - I didn't notice this has the same behavior as my second comment, where off-axis response is improved.

                                    Also on the tweeter, I see the on axis response has a large dip approaching 20kHz which is less noticeable off axis. Any concerns there, or do I remember correctly that these were intended to be listened to with minimal toe-in? Maybe that was a different project...it is right up there at 20kHz so I have my doubts it would be particularly audible.

                                    On the impedance graph there is a bump at about 450Hz, any idea what could be causing that? Interestingly there is a 2dB bump in the combined response around 500Hz which is not shown in any of the individual response graph. Perhaps these are related?
                                    Last edited by technodanvan; 18 April 2024, 17:27 Thursday.
                                    - Danny

                                    Comment

                                    • DaveFred
                                      Senior Member
                                      • Sep 2018
                                      • 179

                                      #21
                                      May have come up with a name for this disaster, the "Sicabarics", original huh? Best I could come up with, just a few days left...

                                      Comment

                                      • DaveFred
                                        Senior Member
                                        • Sep 2018
                                        • 179

                                        #22
                                        With the measurements done and some tweaks done to the crossover, it was time to listen to it, tweak a little more and then build them.

                                        Never having really thought about it before, a three way has double the filters of a two way, and with the drivers I am using, it added up to a lot of parts.

                                        Pic of mess on the floor as I try out parts for the XO.

                                        Pics of building a crossover, pretty normal stuff.

                                        Couple shots of speakers all ready to take to InDIYana tomorrow.

                                        Finished with hours to spare....

                                        See you there!

                                        David.

                                        Click image for larger version

Name:	testing crossover.jpg
Views:	88
Size:	362.8 KB
ID:	952635

                                        Click image for larger version

Name:	low pass1.jpg
Views:	66
Size:	441.9 KB
ID:	952636
                                        Click image for larger version

Name:	bandpass hipass1.jpg
Views:	63
Size:	453.7 KB
ID:	952637
                                        Click image for larger version

Name:	bandpass hipass2.jpg
Views:	61
Size:	375.4 KB
ID:	952638

                                        Click image for larger version

Name:	bandpass hipass3.jpg
Views:	63
Size:	506.5 KB
ID:	952639
                                        Click image for larger version

Name:	bandpass hipass4.jpg
Views:	44
Size:	471.8 KB
ID:	952640
                                        Click image for larger version

Name:	install xo 1.jpg
Views:	45
Size:	468.2 KB
ID:	952641Click image for larger version

Name:	all buttoned up.jpg
Views:	44
Size:	482.0 KB
ID:	952642

                                        Click image for larger version

Name:	all buttoned up 2.jpg
Views:	40
Size:	514.3 KB
ID:	952643Click image for larger version

Name:	upstairs shot 1.jpg
Views:	43
Size:	568.4 KB
ID:	952644

                                        Click image for larger version

Name:	upstairs shot 2.jpg
Views:	43
Size:	555.5 KB
ID:	952645


                                        Comment

                                        Working...
                                        Searching...Please wait.
                                        An unexpected error was returned: 'Your submission could not be processed because you have logged in since the previous page was loaded.

                                        Please push the back button and reload the previous window.'
                                        An unexpected error was returned: 'Your submission could not be processed because the token has expired.

                                        Please push the back button and reload the previous window.'
                                        An internal error has occurred and the module cannot be displayed.
                                        There are no results that meet this criteria.
                                        Search Result for "|||"