How to fill gaps in speaker box?

Collapse
This topic is closed.
X
X
 
  • Time
  • Show
Clear All
new posts
  • riceaterslc
    Senior Member
    • Aug 2006
    • 205

    How to fill gaps in speaker box?

    If this is in the wrong forum, I apologize. I did a search, but came up with nothing.

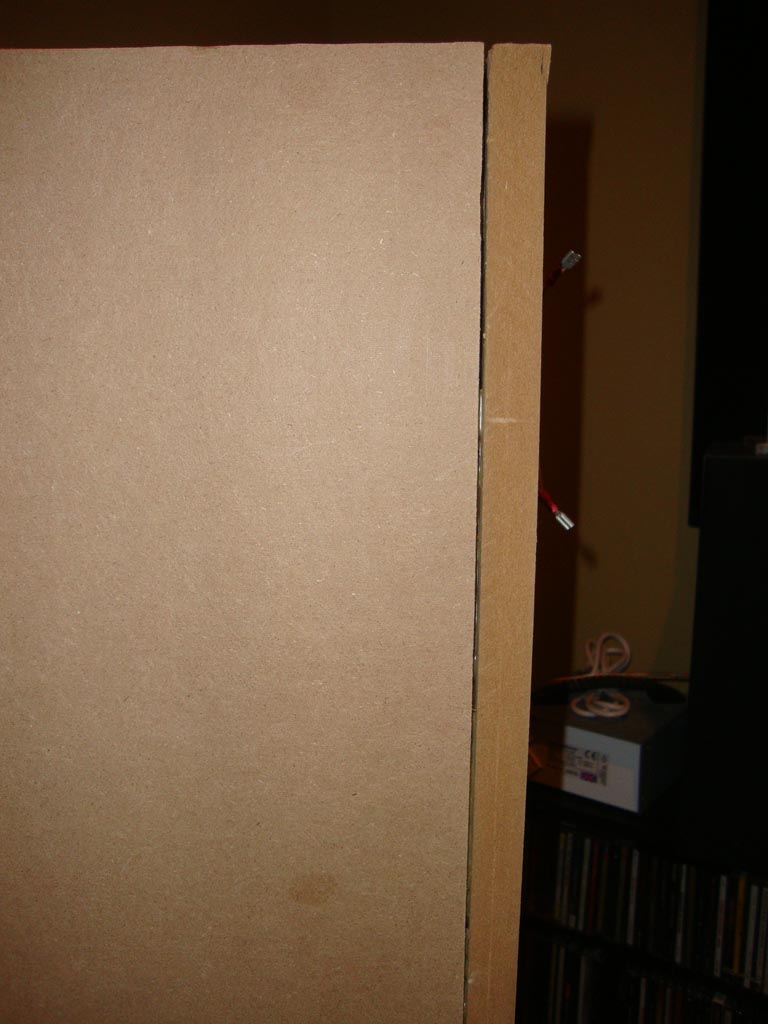
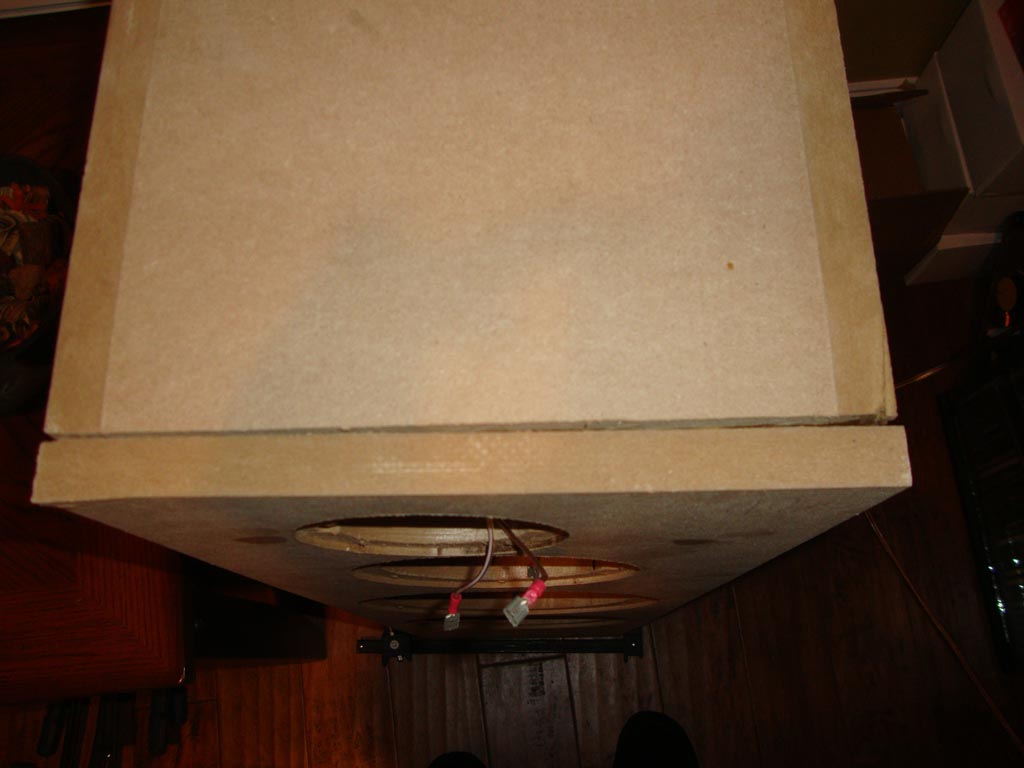
    When constructing my RS TMWW speakers I ran into this snag. When placing the face piece of the speaker onto the rest of the box (side and internal braces) a gap was created about 1/8" between the two.

    The box is sealed, since the face piece is 2 x 3/4" MDF sheets glued together, so the gap is only cosmetic.

    I was thinking I could use drywall filler or wood glue to fill the gap. What do you guys think? I plan on finishing the speaker off with truck bed liner (I move about once a year, want something durable).

    I'll try and snap of shot of it when I get home tonight.

    What are you guy's thoughts? Thanks h:
    chris
  • mattsk8
    Member
    • Oct 2011
    • 62

    #2
    Bondo works really well but you need to apply one coat, sand and let it dry and shrink, then put on at least one more coat and finish sand it. Usually it takes about 3 coats to get a real good finish. The 3rd coat is generally just filling in pits or little dips.

    Drywall mud works pretty good too but it's always prone to denting or getting scratched. Is this going to be veneered or painted? If painted I'd say bondo, if veneered I think drywall mud would work and that would be the easiest route.
    If you build a man a fire, he'll be warm for a day. If you set a man on fire, he'll be warm the rest of his life :T

    Comment

    • ---k---
      Ultra Senior Member
      • Nov 2005
      • 5204

      #3
      Agreed. I've used Bondo and it works well. Minwax also sells a wood repair product that is basically Bondo. Wood glue mixed with fine sawdust into a paste would work. Wood putty would also be high on my list. I haven't used dry wall mud on a speaker. I agree it would be soft and likely not the best.
      - Ryan

      CJD Ochocinco! ND140/BC25SC06 MTM & TM
      CJD Khanspires - A Dayton RS28/RS150/RS225 WMTMW
      CJD Khancenter - A Dayton RS28/RS150/RS180 WTMW Center

      Comment

      • fbov
        Senior Member
        • Jun 2008
        • 479

        #4
        Originally posted by riceaterslc
        ... When placing the face piece of the speaker onto the rest of the box (side and internal braces) a gap was created about 1/8" between the two....
        Normally, I suggest you make sure the box is the one that's flat and square, then use clamps... I've used hardwood panels for baffles several times, and they always warp a little or have a little bow to them I can't plane out.

        Of course, if the glue is already dry....

        Have fun,
        Frank

        Comment

        • riceaterslc
          Senior Member
          • Aug 2006
          • 205

          #5
          thanks for the quick replies guys, seems bondo is the the best solution.

          i will be using truck bed liner as the finish.

          here are a couple shots of what i'm dealing with


          Originally posted by fbov
          Normally, I suggest you make sure the box is the one that's flat and square, then use clamps... I've used hardwood panels for baffles several times, and they always warp a little or have a little bow to them I can't plane out.
          i did a test fit with all the pieces before glue, and didn't take into account the wood expanding. could have also been the humidity since i'm in georgia. oh well, lesson learned and luckily i corrected it before assembling the other speaker :T

          thanks again fellas.
          chris

          Comment

          • fbov
            Senior Member
            • Jun 2008
            • 479

            #6
            Just a thought... with a parallel gap like that, the best filler is a thin strip of MDF, so you're only filling seams with bondo/filler.
            Frank

            Comment

            • Mrpictureman
              Junior Member
              • Aug 2008
              • 28

              #7
              I had a similar situation where I wished I could just take the piece off and re-glue it, so I did. I found this handy tool http://www.sears.com/shc/s/p_10153_1...&blockType=G10 that worked perfect for me. I was able to use the blade on the tool in the picture and it came off really easy. Be forewarned it worked really well for me, (cut right through the glue a little sanding and brand new again), but I can't vouch for your skills or results.

              Comment

              Working...
              Searching...Please wait.
              An unexpected error was returned: 'Your submission could not be processed because you have logged in since the previous page was loaded.

              Please push the back button and reload the previous window.'
              An unexpected error was returned: 'Your submission could not be processed because the token has expired.

              Please push the back button and reload the previous window.'
              An internal error has occurred and the module cannot be displayed.
              There are no results that meet this criteria.
              Search Result for "|||"