
 Tweet
Tweet
You might be wondering why I'd be building yet another sub when I have two 220L tempest in the theatre but it’s not going in the theatre but the living room which is our second zone. There's presently two Paradigm Atoms up there that do a nice job for what we need but bass is something they simply can't do well...which is no surprise given their tiny size. Some time ago Bob Reimer asked me if I'd be interested in building one of their new subwoofer kits based on the Shiva, EZSub14 and the Sub100 plate amp. Bob happened to be flying to Winnipeg this weekend so I met him at the airport and picked up the box containing the driver, amp, box and all the little goodies needed (glue,wire,stuffing,screws etc) The box it comes in weighs in at 45lbs which didn't seem to heavy when I picked it up off the airport carousel but by the time I got to my car my arms were now a good 4" longer and I'll be visiting my chiropractor soon  Anyway I told bob that I'd build this sub the way someone without access to tools and a "shop" to see how viable these would be for a complete novice to DIY so here goes...
The first thing I did when I got home was to open the box to see what was in the box. Click Here to see the box and Here to view the contents. As you can see it’s a very well thought out kit with everything needed all provided in a nice well packaged box.
The first thing I noticed after unpacking the MDF for the box was that the edges were routed so that they had a nice dove tail like edge which makes putting the box together incredibly easy and fool proof. Because of these routed edges you won't need clamps to hold the box together...in fact all you'll need is the supplied duct tape to hold it together while the glue dries. Click here to see the box been assembled. Here's a close up of the routed edges and here's a picture of the box being held together with the provided duct tape while it dried. Here's a picture of the bottom of the box showing the cut out for the driver and the amp. It only took about 30 minutes from the time I opened the box to the time I had it glued and taped so it’s very easy to build!
Once the box had dried for a few hours I decided to install the t-nuts to the back side of the bottom plate. Bob was kind enough to include a few extras which is a nice touch in case you happen to loose one during the building process. I was able to hammer the t-nuts into the pre drilled holes but it would have been a lot easier if I'd done that before assembling and gluing the box. You can see the installed t-nuts in this image. You'll note the excess glue along the joints...I doubt it was needed given the nice routed joints but I'm a creature of habit and come from the school of you can never have too much glue That's as far as I got today since I wanted to let the glue dry fully before I installed the amp and driver....stay tuned for part B tomorrow night.

Anyway I told bob that I'd build this sub the way someone without access to tools and a "shop" to see how viable these would be for a complete novice to DIY so here goes...The first thing I did when I got home was to open the box to see what was in the box. Click Here to see the box and Here to view the contents. As you can see it’s a very well thought out kit with everything needed all provided in a nice well packaged box.
The first thing I noticed after unpacking the MDF for the box was that the edges were routed so that they had a nice dove tail like edge which makes putting the box together incredibly easy and fool proof. Because of these routed edges you won't need clamps to hold the box together...in fact all you'll need is the supplied duct tape to hold it together while the glue dries. Click here to see the box been assembled. Here's a close up of the routed edges and here's a picture of the box being held together with the provided duct tape while it dried. Here's a picture of the bottom of the box showing the cut out for the driver and the amp. It only took about 30 minutes from the time I opened the box to the time I had it glued and taped so it’s very easy to build!
Once the box had dried for a few hours I decided to install the t-nuts to the back side of the bottom plate. Bob was kind enough to include a few extras which is a nice touch in case you happen to loose one during the building process. I was able to hammer the t-nuts into the pre drilled holes but it would have been a lot easier if I'd done that before assembling and gluing the box. You can see the installed t-nuts in this image. You'll note the excess glue along the joints...I doubt it was needed given the nice routed joints but I'm a creature of habit and come from the school of you can never have too much glue
That's as far as I got today since I wanted to let the glue dry fully before I installed the amp and driver....stay tuned for part B tomorrow night.


 ops: Anyway I'm in St.James so you're pretty close and I work at Oak Hammock Marsh so I could pretty easily drive by you on the way home from work. I'd love to hear those 281's. What sort of amps are you driving them with?
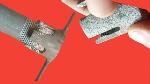

Comment