CupCak3's Modded Statement and AV15 Bassbin Build Thread

Collapse
This topic is closed.
X
X
 
  • Time
  • Show
Clear All
new posts
  • CupCak3
    Senior Member
    • Oct 2007
    • 127

    CupCak3's Modded Statement and AV15 Bassbin Build Thread

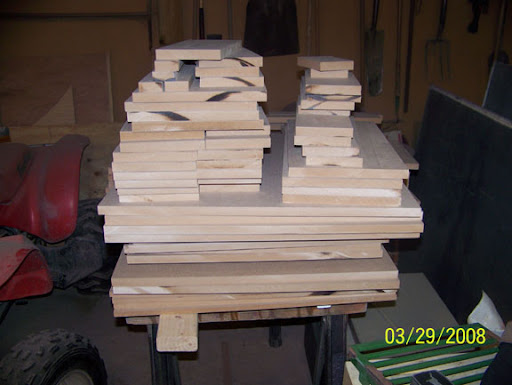
    I've finally begun my speaker building journey and decided to do a “modified” Statement build using a 40” sealed box on top of an AV15 powered subs. I’ll update this opening thread with updated build schematics and other useful information as go through my process.

    Brian was kind enough to send me his original CAD drawings for the Statements. I’ve modified them the sealed design. Sealed The net box vol. is 60L. I’m currently tossing around the idea of porting these and possibly changing the depth (per Jim’s comment in the Statement build thread) to get a bit more in the 60hz range. Unibox data will come later. The tweeter will be positioned approximately 40” from the floor. The enclosures will be bolted, flush faced, onto the sub boxes.

    Hopefully later this week or early next, I’ll post my design for the subs. They will be boxes tuned between 16 and 18hz with dual Acoustic Elegance 18” passive radiators with 2100g of mass each. The drivers will be the newly designed AV15s. I got a great deal on them since they are prototype units. I’ll post my unibox data later.

    Feel free to comment on the Statement modifications and my sub design. More information to follow soon.

    I would like to thank Jim and Curt for all their help and the great design! I’m hoping to have these finished and in my home theater within 2 month
    Last edited by ThomasW; 30 March 2008, 17:34 Sunday.
  • impala454
    Ultra Senior Member
    • Oct 2007
    • 3814

    #2
    Awesome! It's great to have drawings for the sealed statements. I've only built the center so far, but this is the direction I will go when I get around to the front channels. I will be watching this thread closely and look forward to seeing your work.
    -Chuck

    Comment

    • Jim Holtz
      Ultra Senior Member
      • Mar 2005
      • 3223

      #3
      The drawings look great! I also wouldn't worry about getting a 60 Hz. bump. Adjust the crossover up a little on the sub and dial in a bit more volume and you can easily season to taste. :T

      Jim

      Comment

      • CupCak3
        Senior Member
        • Oct 2007
        • 127

        #4
        Well it looks like this weekend I’m finally able to cut and glue wood!

        I’d like some feedback on my sub box design. I haven’t done any extractions yet since I’m still “tweaking” things so I just dimensioned in my model. (Jim, you’re HO design will be on its way, I promise… again )

        Each box will use one AV15 and two 18” passive radiators. I’d like the box to dig a bit deeper, but having dual boxes, including room gain and EQing I believe I’ll have a nice response in the end. Unfortunately my room does not leave other options for IB or subs placed anywhere besides under the mains (at least where my wife would accept).

        This design is using ¾” MDF for the walls. I’m thinking using square strips for corner bracing with this design. I placed the PRs towards the rear of the box for aesthetic reasons; will this cause any problems even though the PRs are opposite firing?

        Attached are pics of the box, the main + sub setup and response graphs.

        Thoughts?
        Attached Files

        Comment

        • KorbenDallas
          Junior Member
          • Jul 2007
          • 21

          #5
          Originally posted by CupCak3
          (I’ll post cut diagrams later. The pdf with all 5 pages currently goes over the max attachment limit.)
          I'd love to see the rest of the PDF!

          Comment

          • CupCak3
            Senior Member
            • Oct 2007
            • 127

            #6
            Originally posted by KorbenDallas
            I'd love to see the rest of the PDF!

            Sealed

            I'll update the OP.

            Comment

            • KorbenDallas
              Junior Member
              • Jul 2007
              • 21

              #7
              Originally posted by CupCak3
              Sealed

              I'll update the OP.
              Fantastic! Thank you for providing this as a resource to everyone!

              Comment

              • CupCak3
                Senior Member
                • Oct 2007
                • 127

                #8
                Originally posted by KorbenDallas
                Fantastic! Thank you for providing this as a resource to everyone!
                Jim and Curt deserve all the thanks, drawing with CAD is the easy part

                Comment

                • CupCak3
                  Senior Member
                  • Oct 2007
                  • 127

                  #9
                  This has been quite the weekend... 4 sheets 3/4" and 1 sheet of 1/2" MDF later I now have all the cutouts for LRC statements, my two subs and R44s as rears. I don't believe I've ever made so many cuts in one day!!! I'm going to start glueing tomorrow after work so I'll post plenty of pics within the next couple of days (probably starting w/ the ridiculous pile of wood I now have )

                  Now that I'm starting to look forward in my design process I have a couple of questions. When doing the cutouts for the driver recesses, how exactly do you do them and what bit do you use? It looks like the easiest way would be to cut the flush mount pass first and then do the center cut fully through the baffle. Is there any way to do this w/o buying a plunge router? Thanks!

                  Comment

                  • yousuredo2
                    Senior Member
                    • Jun 2006
                    • 206

                    #10
                    I Use a regular flush cut bit, some use and swear by the upward cutting bits.
                    Yes you do the recesses cut first.

                    when doing the center cut, don't go all the way through...
                    leave a small amount of material there(construction Paper thick).
                    if you don't, you may find that last little bit of cutting, kicks the router out of perfect circle form and makes a BAD spot in the cut...
                    if you leave a little material you can easily cut it with a razor and sand smooth
                    My System
                    ~ BenQ w5000 DLP 1080p Projector
                    ~ Sony Bravia SXRD KDS-60A3000
                    ~ Onkyo tx sr805
                    ~ Sony PS.3
                    ~ Xbox 360
                    ~ Natalie P's Main L/R
                    ~ Polk Csi A6 -Center
                    ~ Polk RTi6 Rears
                    ~ Behringer ep2500
                    ~ Behringer Fbq 2496

                    Comment

                    • impala454
                      Ultra Senior Member
                      • Oct 2007
                      • 3814

                      #11
                      Originally posted by yousuredo2
                      if you don't, you may find that last little bit of cutting, kicks the router out of perfect circle form and makes a BAD spot in the cut...
                      Another suggestion I have found to work well is having a scrap piece underneath, and driving nails or screws through the circle that gets cut out. This will keep everything in place while you complete the circle.
                      -Chuck

                      Comment

                      • Brian Walter
                        Senior Member
                        • Sep 2005
                        • 318

                        #12
                        Originally posted by impala454
                        Another suggestion I have found to work well is having a scrap piece underneath, and driving nails or screws through the circle that gets cut out. This will keep everything in place while you complete the circle.
                        Double faced carpet tape works very good at holding the pieces in relative position while routing. But this only works if you route your baffles before you assemble the cabinets. If you do your routing after cabinet assembly, then yousuredo2's method works best.

                        To answer your question about needing to buy a plunge router, you can do it with a fixed base router, but it is a little sloppier and possibly a little dangerous. You can loosen the depth adjustment stop on a fixed base router and slowly lower the bit down into the MDF, but keep in mind the router is basically loose at this point so you can get some uneven cutting until you tighten it back up.

                        Brian Walter

                        Comment

                        • CupCak3
                          Senior Member
                          • Oct 2007
                          • 127

                          #13
                          Thanks for all your help guys!

                          It sounds like I can get away with buying one straight cut bit to do w/ driver recess and cutout. Would there by any advantages to going w/ a single or double flute bit? I'm currently looking at these: http://www.routerbits.com/cgi-router...38454_12063+12

                          For "rounding out" the back of the baffle for the drivers, is there any advantage to using a chamfer vs a roundover bit?

                          It'll probably be at least a week or so until I can get to routering but wanted to make sure I had everything I needed beforehand.

                          Comment

                          • BobEllis
                            Super Senior Member
                            • Dec 2005
                            • 1609

                            #14
                            You'll want to use a double flute bit for the outer diameter of the recess for its smoother cut. It can be used for cutting out the driver hole, but a single will be faster if you can afford it.

                            A chamfer opens more space, slightly improving airflow.

                            Comment

                            • Coconutout
                              Senior Member
                              • Oct 2006
                              • 329

                              #15
                              woot. much respect. this is exactly what i wish i could do with my statements. im getting SDX 15" sonosub instead. i'm average height so i need my ribbons around 32-35". so that rules out pretty much any kind of 12" bass bin

                              Comment

                              • CupCak3
                                Senior Member
                                • Oct 2007
                                • 127

                                #16
                                Originally posted by BobEllis
                                You'll want to use a double flute bit for the outer diameter of the recess for its smoother cut. It can be used for cutting out the driver hole, but a single will be faster if you can afford it.

                                A chamfer opens more space, slightly improving airflow.

                                Thanks! I'll see how much my other bits from MCLS add up to. Hopefully budget will let me get both :T

                                Originally posted by Coconutout
                                woot. much respect. this is exactly what i wish i could do with my statements. im getting SDX 15" sonosub instead. i'm average height so i need my ribbons around 32-35". so that rules out pretty much any kind of 12" bass bin
                                I think you could make your 35" requirements in using a 12" sub. I actually modded my box a bit more. I cut another 1.5" off the top and bottom and added another 0.5" to the depth. This still kept the box Q around 0.67 - 0.68 I believe. This takes my tweet height to 39".

                                Comment

                                • CupCak3
                                  Senior Member
                                  • Oct 2007
                                  • 127

                                  #17
                                  Well here are some well over due pictures (as you can see from the image date stamps)

                                  Here's the pile of wood needed to build my LR Statements, the CC, R44 rears and two AV15 sub boxes. I never imagined soo much MDF dust in my life...


                                  Here's the scrap after 5 sheets of MDF... I'm actually quite impressed with the small amount of waste I actually had.


                                  Hopefully I'll actually get some box pics snapped tonight!

                                  Comment

                                  • looneybomber
                                    Senior Member
                                    • May 2007
                                    • 194

                                    #18
                                    ...And some of those scraps might later be used as bracing or other things, so, don't get them wet

                                    Comment

                                    • CupCak3
                                      Senior Member
                                      • Oct 2007
                                      • 127

                                      #19
                                      Originally posted by looneybomber
                                      ...And some of those scraps might later be used as bracing or other things, so, don't get them wet
                                      already done

                                      Comment

                                      • CupCak3
                                        Senior Member
                                        • Oct 2007
                                        • 127

                                        #20
                                        well my sub boxes are getting quite close to completion... (i'm still waiting for back ordered stuff from PE for mains and center )

                                        Putting in the final bracing...


                                        Putting the top on...


                                        Now I just need to glue on the extra front and side baffles (I wasn't very smart when I did the box design... ahh lessons for next time) If I don't have to go into work next weekend, I'm hoping to get the rest of the boxes routered and the faces glued on. I might even be able to get the R44s put together :-y

                                        Comment

                                        • shame302
                                          Member
                                          • Apr 2008
                                          • 91

                                          #21
                                          so where'd you get AV15s? hows the progress?
                                          Psudo HTPC, Nuforce AVP 16, Emotiva XPA 5, Statements mains and center, Dayton in wall rears, Twin Tempest X 7CUFT sealed, and very cool and understanding wife!

                                          Comment

                                          • CupCak3
                                            Senior Member
                                            • Oct 2007
                                            • 127

                                            #22
                                            I got the AV15s and PRs directly from Acoustic Elegance.

                                            All of the boxes are now complete except for front baffles. I'll hopefully get them routed and assembled this next weekend. The rest of my crossover parts *finally* came in the mail but due to work I probably won't be able to get to them for a while...

                                            More pics to come...

                                            Comment

                                            • shame302
                                              Member
                                              • Apr 2008
                                              • 91

                                              #23
                                              i thought they weren't making those anymore? when did you get em? sounds really sweet!
                                              Psudo HTPC, Nuforce AVP 16, Emotiva XPA 5, Statements mains and center, Dayton in wall rears, Twin Tempest X 7CUFT sealed, and very cool and understanding wife!

                                              Comment

                                              • CupCak3
                                                Senior Member
                                                • Oct 2007
                                                • 127

                                                #24
                                                I got them January-ish. John is coming out w/ a "new and improved" AV** line. The ones I received are prototype models.

                                                Comment

                                                Working...
                                                Searching...Please wait.
                                                An unexpected error was returned: 'Your submission could not be processed because you have logged in since the previous page was loaded.

                                                Please push the back button and reload the previous window.'
                                                An unexpected error was returned: 'Your submission could not be processed because the token has expired.

                                                Please push the back button and reload the previous window.'
                                                An internal error has occurred and the module cannot be displayed.
                                                There are no results that meet this criteria.
                                                Search Result for "|||"